Pages

Friday, October 28, 2011

Patriotic Stars and Christmas Stars

I've sewn up six of the seven blocks I cut last week for John'aLee and her Fallen Soldier Project. They are working out nicely and I am having fun playing with my R/W/B fabrics. Only one more to go and then these will be in the mail. Still time to help out if you can. Remember, she has extended the deadline to the end of November.
I have already posted photos of 2 of these
blocks in recent posts, but 4 of them are new.
I have all of the pieces cut for my Christmas Smokey Mountain Stars quilt, based on Bonnie Hunter's pattern here.
And tonight I started sewing on corners. I'm making the quilt just a little larger than the pattern, so I hope I calculated amounts of squares correctly and I won't have to go back and cut more.
I think this one will go quickly, as does the secret Christmas gift quilt currently on my design wall. Some of you have asked about it and I have emailed pictures of it to a few of you. Thanks for all of the feedback and positive responses. It should be off the wall and to the longarm quilter by next week. Then this Christmas quilt will take its place. Then I want to make the Christmas wall hanging from the drawing I won on LuAnn's blog. We'll see if either of these actually gets quilted in time for the holiday season.

Have any of you seen this?
My blog friend, Mary C. from Washington, sent this notice to me. If you enjoy the Elm Creek books (just read my first one this summer), you might want to check out the schedule on the flip side of this ad and see if Jennifer is coming to a bookstore near you.


Until next time, from the little mountain valley where the sagebrush grows,
Janet O.

Sunday, October 23, 2011

What now?

Well, the Tree of Life quilt in my last post had been on my design wall for so long that after taking it down and finishing the borders, the room seemed strange without it. What goes on the wall now? I wish I could show you, but it is a gift for someone who reads this, so I won't be showing it until after Christmas (and she knows who she is). I will say that it is a quick pattern and I am loving the result. I will probably make another one in the future.
I spent much of last night cutting out more blocks for John'aLee. I was going to make one a week, but like Freda, once I had the fabrics out to make one, I figured I would cut them all. Once they are cut it is hard to not just get them sewn up. Tonight I made another one.

I really like to try and make each star unique. Gets the creative juices flowing. I have five more blocks cut and hope to have them all in the mail by the end of the month.
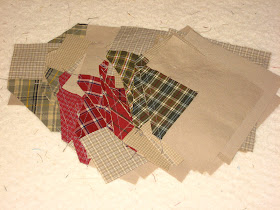
In the meantime I am also working on a Christmas quilt for the family room. After digging up the entire strawberry bed this afternoon and separating plants and replanting, my back was really talking to me. So this evening I sat on a heating pad, deconstructing shirts, while watching the world series game. Apologies to my friends in Texas, but I have a SIL from St. Louis, so we have been cheering on the Cardinals, and what a night they had!
These are the shirts I took apart while the
 Cardinals kept crossing home plate!
Anyway, back to the shirts. I am planning on making Bonnie Hunter's Smokey Mountain Stars, but I want to only use red and green plaid shirts, along with the tan background color. My dilemma is this, should I make the centers of the stars one color and the points another? Should I make some all red stars and some all green stars? Or should I let the red and green fall randomly? This is Bonnie's quilt below (which I love), but if I am just using two colors besides the background, I can't decide if I should control the placement of the color more, or just let the chips fall where they may. Do you have an opinion (you know you do)? Please share--I love brainstorming--even via blogs!
From Bonnie Hunter's free patterns. The link above
will take you right to this pattern.
This is uncharacteristically short for me, but the heating pad calls.
Until next time, from the little mountain valley where the sagebrush grows,
Janet O.

Thursday, October 20, 2011

Ta-Daa!


Do you remember this--my youngest son's memory quilt from his time as a missionary in Brazil? I've blogged about it plenty, here, and here. You may recall that at the last sighting I was asking opinions on border choices, and I received many helpful suggestions, all of which I tried out on the design wall. But as I sat across the room from the design wall and pondered the look of the different borders, one thing became very apparent to me. The cobblestone blocks were overpowering the quilt. I wasn't about to scrap them altogether, but somehow I had to tame down the look. I struggled with this for some time--this has been on my design wall for months, which seemed like forever. Finally I knew I had to pull out my trusty seam ripper and deconstruct those cobblestone blocks--all 17 of them. What you see above is the almost finished product. In an attempt to make a quilt that wasn't a square, I had not put the cobblestones across the top of the quilt, but I wasn't crazy about that look. Once I took apart the stones, I was able to string a single row of stones across the top. Now the quilt is just barely not a square, but I think the addition of  blocks on top helps the look immensely. I also decided that all of the straight inner borders needed to be double colors and narrow. The three strips of color along the outer edge of the quilt have not been sewn on yet, so they look a little wider than they will actually be. Everything else is stitched together. I am much happier with this result, and I hope to finish sewing on those borders tomorrow.
You be the judge. Look at what I was showing you last time around with this project.
See how much bigger the cobblestone blocks are--and none of them go across
the top of the quilt. And the borders are wider and not so plentiful. I like
the new version so much better.
Tonight I got my weekly block for John'aLee's Fallen Soldier Project made. Most of my red/white/blue fabrics are remnants and scraps, with an occasional FQ. I love the challenge of pulling out all of the possible red/white/blue combinations and trying to choose the right pieces to make a star that is a little different than the last one. But that is just my idea of fun--take something easy and see how you can complicate it. Kind of warped, huh? BTW, the above link is John'aLee's original request for help with making blocks. If you can help out, remember that she has extended the deadline to the end of November. 

I'll leave you with this scene from the back door. Remember those mountains in a recent post that were blanketed with snow? Well, here they are again. It has been above normal temps, the snow is gone and the leaves are changing on the mountainsides. I love this time of year. We took a drive up through the canyon this evening and the colors in the mountains were gorgeous--but I forgot my camera. : (
Until next time, from the little mountain valley where fall has arrived,
Janet O.

Sunday, October 16, 2011

Winners and other stuff!

First off, I want to let you know who won the Lynn Roddy Brown books. Congrats to Nancy, a no reply blogger, who won Simple Strategies for Scrap Quilts. Nancy, I need you to email your snail mail address to me so I can mail the book to you. Congrats also to Yvette, who won the Block Swap book. Thanks to all who participated! I hope the winners enjoy those books as much as I do!
I finally have another flimsy completed.I cut this out months ago using one of Lori Smith's Fit to Frame patterns.
The inner, pieced border gave me fits. I made it according to the pattern, I thought,  and it didn't fit--it was way too long on every side. Luckily I had only sewn 1 1/2 sides together when I realized the problem. I have no clue what went wrong. I checked my measurements with the pattern and I had cut things right. Anyway, I ended up making 1 1/2" HSTs to create the border instead of the method the pattern used. I have coveted the sample of this they have in a LQS every time I go in, so I decided I needed to just make one. I don't think I will frame it. I want to hand quilt it and bind it and put it on a wall somewhere, but I am trying to decide if I want to add another brown border to the outer edge. This is my first real mini quilt and I have to say that all of you out there blogging about how a mini quilt gives you a quick finish should come give me lessons. This did not go together quickly for me. But I will be making more. I love the result!

Another fun thing in the "little" department (or maybe I should say "tiny") is the foundation paper pieced jewelry made by Julie at Me and My Stitches. Some of you may recall that I won her giveaway a while back, and I chose a flag pin. Well, I finally got around to ordering more. I intended to order some traditional blocks, but when I saw the pumpkin and stained glass heart I was through looking.

Aren't they fun? Julie says she is going to be putting more on her website (which you can access by clicking the header photo on her blog) soon. You can get pins, pendants, earrings, and scissor fobs. I like a seasonal pin on my jacket or coat lapel, so these are all pins.

These are the blocks I have sent already.
They don't need to be this involved.
I always complicate things
One more thing, if you are not already aware. John'aLee has moved the deadline for 8" or 12" (finished measurement) patriotic star blocks to go into 5 quilts she is making for her daughter (whose fiancee was killed in Afghanistan just before they were to be married), the soldier's mother, two brothers and best friend, who was with him when he was killed. If you were hesitant to help because of the deadline, she has extended it to the end of November to try and collect all of the blocks she needs. You can go to her blog, The Scrappy Appleyard, for more info. I've already sent my blocks, but I am going to try and join Freda at The Adventures of the Empress of the Universe in  making one more each week until the last week of November, so we can each send her a few more.


I had more to share but it is late, so I'll save it for another post.

Until next time, from the little mountain valley where the sagebrush grows,
Janet O.

Wednesday, October 12, 2011

More books to give away!!

Want more scrap quilt ideas? You've come to the right place. Recently we met here for the purpose of a giveaway of Lynn Roddy Brown's latest book, Patchwork-Play Quilts. You may recall that at the end of the post I shared these photos of Lynn's previous books.                                                                                                                             
After that giveaway, Lynn generously offered to send me copies of her first two books to be given away. So Scrap Quilters, here we go again!! To be entered you don't have to be a follower or post this on your blog, just leave a comment below. The books will be given away separately, so your comment will give you two chances to win. The RNG will choose a winner for each book. If you would like to be entered twice I will add your name a second time if you do post a link to this page and let me know that you have done so. If by some rare chance the same name comes up for both books, I will give that individual their choice of which book they would like and I will redraw for the other one. 

The first book, Simple Strategies for Scrap Quilts, is a great place to start if you have never made a scrap quilt, but have been wanting to try. Lynn includes chapters on "Understanding Scrap Quilts", "Collecting Fabric", "Quiltmaking Basics", "Designing with Scrap Blocks", and "Finishing the Quilt". I love this statement from Lynn in the chapter "Understanding Scrap Quilts";
  "Scrap quilts look great from a distance and are full of surprises when you get up close. I hate bed making, but when there's a scrap quilt on the bed, I can find joy in all the colors, textures, and patterns as I go through the drudgery."
There are kernels of quilting wisdom and knowledge in every section of this book. I wanted to include more of it, but I'm covering two books here, so I can't get very detailed or this will take forever. All of the quilts in this book are within the "beginner to intermediate" range. Most of them are surrounded by two straight borders, a narrow one and a wide one, though now and then a quilt will break that mold. All of the quilts are visually appealing. Enough said, let's look at some pictures!!
Lynn made this quilt using a consistent light
fabric throughout the quilt.
This quilt was created from blocks received in a swap.
By reversing the value placement from one block to the next,
the eye is kept hopping over this colorful quilt.
If you like "scrappy", but with a little more controlled look,
Lynn recommends using related fabrics in a quilt, as in this
one made with 30s reproduction prints. . .
. . . or this one in CW pinks and browns.
These bow tie circles were made using highly contrasting
fabrics and repeating the same in the outer border.
That gives you a taste of the sixteen quilts within the pages of this book. All of the patterns offer clear, full color illustrations to go along with the concise instructions.
Let's move on to "Simple Strategies for Block Swap Quilts." I admit that I was hesitant to buy this, based on the title. I have never participated in a block swap and am not sure if I ever will. But once I looked inside the cover I was sold. There are so many wonderful scrap quilts here, with the patterns to make them from scratch, in case you are like me and don't have blocks from a swap.
Lynn offers this insight into why she loves swaps (she belongs to two swap groups), "The blocks I receive in trades are one step up from my fabric stash. They are a head start on a quilt, waiting there for me when and if I am inspired to use them."
Along with the sections on understanding scrap quilts and designing with blocks (which are not just lifted from the previous book, there is new stuff here), there is a section on how to organize and conduct a block swap. If you are looking for a project for a guild, or want to start a swap group, this section contains valuable helps. Lynn also discusses the "controlled" approach to scrap quilting versus the "just go for it" method. You will probably be able to define your style after reading this and trying your hand at a scrap quilt.
Many of the 15 patterns include alternative layouts for the block involved. Several patterns have tips to use if conducting a swap for that specific block. 
Now let's see some of the treats in this book.
I always say I've never met a churn dash I didn't like and this is no
exception. I especially like the secondary pattern created by
the flying geese units in the sashing.
Not all scrap quilts have to have a vintage look. This is a
beauty, with the black chains making the bright colors
shine. Mary (Quilt Hollow), if you are reading this, this is
where I remembered seeing that block in your little
Schnibbles quilt! : )
Doesn't get much scrappier than this. Love it!!
This quilt was the result of a trade using blue and yellow HSTs and
four patch units. Value placement made all the difference in
creating a stunning pattern that spills into the borders. 
The swap that made this quilt happen consisted of trading 4 identical
4-patch units. The "on point" setting, placement of the light squares in
the centers and corners, and creative sashing give so much visual
interest and fool the eye into thinking the black lines are slashing
through larger "Puss in the Corner" blocks.
 That about covers it. I just want to add that no give away copies of books were harmed in this post. All photos were taken from my own well-marked, tabbed copies of these books. If you win you will receive a pristine, "spine never cracked", autographed copy!
So leave those comments and if you want to be in the drawing twice you can blog about this and post a link. You have until 10:00 p.m. Saturday, MDT. I will post the winner later that night and ship the books out Monday! Good Luck!!

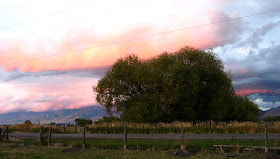
Until next time, from the little mountain valley where it looked like the mountains were on fire last night, 
Janet O.
Saturday, October 8, 2011

A Plethora of Pumpkins!

Pumpkins, pumpkins everywhere! Look at this pumpkin patch on my dining room table. Last year I was responsible for table decorations for a dinner at church. I already had 6 or 8 of these pumpkins. I had been gifted a few and found a couple more at local thrift stores. I thought if I could just make a few more I could incorporate those pumpkins with some resin and glass pumpkins I had in my fall decorations and I would be set. I looked online for a tutorial and settled on the one found here. I experimented  and decided on some changes. Instead of yarn, I used a few strands of embroidery floss--easier to match the pumpkins, since I already have most of the DMC floss colors. Also, I found that the very long doll maker needles worked much better than the ones in the tutorial, especially when making the really big pumpkins. One of the pumpkins that had been given to me had a leaf on it. I liked that look, so I made them for most of my pumpkins. Also, one I bought at a thrift store had a curly tendril made from a wire covered with green paper. I experimented with some different forms of green wire and think I will add more tendrils to these with green florist wire.

I caution you--be careful about clicking that link. Making these became addictive. I even made another 6 not shown, that I divided between my daughters. DH would look at me surrounded by fabric, floss, fluffy stuffing, and long needles night after night and just shake his head. "I thought you were just going to make a few," he said. I replied that when I got out the resin and glass pumpkins I realized that they just didn't go with the look of these fabric pumpkins. "It would only bother you," he answered, knowingly. And he was probably right, but it would bother me enough that if I could do something about it, I would. Can you say "obsessive compulsive"?

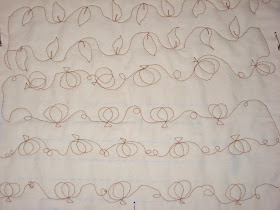
Yesterday was day two of my machine quilting class. I admit that I hadn't practiced during the week as I should have. We were shown lots of flowers, hearts and swirly designs and then given free time to practice designs of our choosing. I figured at this time of year I would be needing pumpkins and leaves for something, so I practiced them on one of my "sandwiches". I am proud to say I am now getting the stems ON the pumpkins (most of the time) and those leaves were really leaves, not just attempts at hearts that looked more like leaves.
I'm not ready to put my skills (and I use the term loosely) to anything "official", but I am seeing improvement. I'll use the pumpkin theme of this post as an excuse for not showing you my attempts at flowers. : )
While putting out the fall decor I came across this table runner, hutch pad and table topper made with a fun pumpkin fabric I found in a thrift store and pieces from my scraps (the reds aren't really pink, as they seem in the photos). I had hurriedly hand quilted them a couple of years ago. I was new to table runners and I should have used a much thinner bat (or, as my DH's Aunt does, just flannel). They also need more quilting, but aren't the pumpkins in the fabric cute?
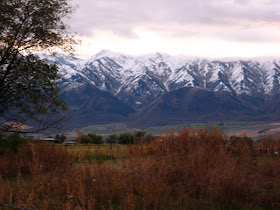
As I was leaving for the grocery store at dusk this evening I caught sight of the new snow on the mountains west of us and I had to grab the camera for a shot.
It seems way too recently that I was taking shots of late spring snows on these mountains. Where does the time go?                                                                                                                                                                                
As I was taking that shot I had a visitor. I'm not sure if this is Billy or Otis, but he belongs to my BIL, and lives in the pasture right behind our house.

Until next time, may all your pumpkins be great!
Janet O.

Wednesday, October 5, 2011

T-Shirt Finale!

My oldest son's college graduation t-shirt quilt is finally done! My long arm quilter said she wouldn't be sad if she never had to do another t-shirt quilt. So I guess I really need to practice my FMQ skills so when my youngest son graduates I can quilt his myself. 
I used at least 40 t-shirts in this quilt and I still had a laundry basket full of shirts leftover. This son doesn't know the meaning of the term "over-involved". His brother seems to be following in his footsteps, so I know there is another one in my future.
Those of you who have made one of these know how much work they can be--much more than I expected. You have to stabilize the fabrics and figure out a layout using the different sizes of designs. I complicated things by piecing and bordering blocks, and then fussy cutting the sashing to keep it from adding to the busyness of the already busy quilt. 
I actually bound this one myself and it is such a relief to have it finished.
Until next time, from the little mountain valley where fall has finally arrived,
Janet O.

Monday, October 3, 2011

Need a giggle?


Check out my lovely machine quilting on this muslin "sandwich" from my very first free motion quilting class. How pathetic is this? We did our little sample block the last 15-20 minutes of a two hour class, after learning all about the best tools to use and what settings on your machine are helpful, and where to find sources for ideas and inspiration, how to prepare the quilt and guide the fabric, etc. When we got to the actual free motion stuff we were supposed to give ourselves permission to"play" and try out some of the simple things she had demonstrated--circles, stars, hearts, pumpkins. (I think I lost my permission slip!) If you can detect a pumpkin in there you are my new best friend! I felt I did better at stars than the other things--no need for smooth, round curves on those. When I was trying the hearts, I couldn't seem to get back out of that center point well, so I pretended that I was trying to make leaves all along, not hearts.
As I looked around the class at those working near me I saw that some people really could get the stems attached to their pumpkins, and their hearts didn't look like leaves! I also began to understand all the fuss at the beginning of class about the Bernina machines with the "stitch regulator".
I haven't given up hope yet. There is still another class this week, and then there is a three-part class in November I am considering (depending on whether or not I HAVE given up hope by then). But this is obviously something that I don't take to naturally. Time will tell whether I take to it at all.

Enough of that. On a more serious note, I finally got my star blocks finished to send to John'aLee.
The block to the far right had some issues. Even on Barbara Brackman's blog there is some uncertainty
about the cutting instructions. I did lose some points in the stitching, so now I understand why there was a question about cutting measurements. I did switch out the center fabric on that block, too.
Now to get these off in the mail.

That is all for tonight.
Until next time, from the little mountain valley where the sagebrush grows,
Janet O.