Thursday, June 11, 2020

The Beast Revisited

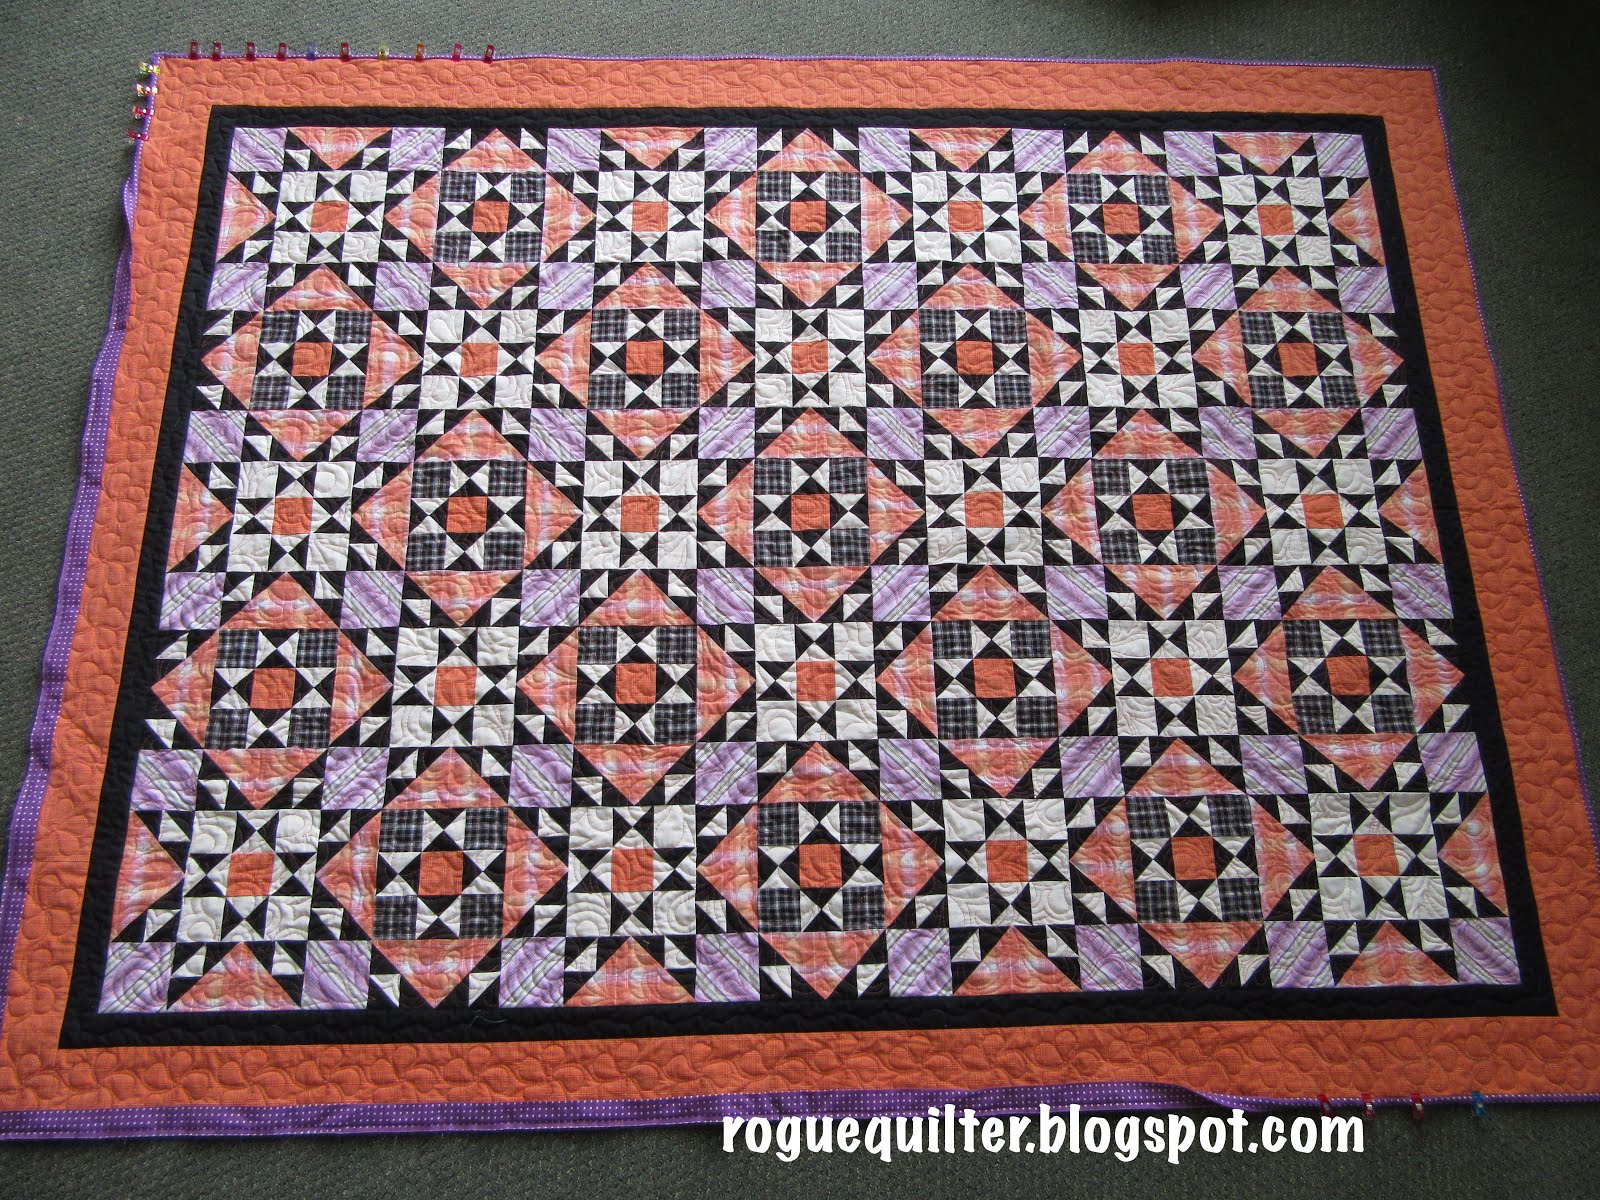
It has been a long time since I felt my shoulder could handle pushing this heavy, king-size T-shirt quilt around under Gidget's needle. It feels good to be seeing real progress now, and without shoulder pain.
This is my youngest son's college graduation quilt. He graduated 5 years ago. Do you think it is about time I completed it? When I started the quilting on this a few years ago my shoulder problems eventually brought it to a halt. After finally having surgery 2 years ago I thought I would get back to this quickly. But healing was slow and then other projects had gotten in the way. Now this is my machine quilting priority, and over the past couple of weeks I have quilted 16 blocks. I have four to go, and then I get to start on the sashing.

I am doing some pretty dense quilting, and I am trying to make each block different from any others.
Some turn out well--others, not so well. The block to the left is one of my favorites. The one below is in the "not so much" category.


I have never loved quilting pebbles, hence I don't do it much, so I can't do it well. But by the time I decided I wasn't thrilled with this block, I had gone too far to unpick (I just wasn't willing to do it at that point). Of course, this is the brightest, most fluorescent of all the blocks, which makes it  obvious. So be it.
These photos show a few of the other designs I used in the quilting.


This T-shirt quilt has a twin brother. My oldest son graduated from the local university in 2011, and only 4 months later his T-shirt graduation quilt was quilted and bound. Of course, I didn't do the quilting myself. Here is the twin--and they were only born 4 years apart. How is that for a trick?
Between the two of them, these are the quilts that compelled me to learn machine quilting. When I picked up this quilt from my machine quilter, she told me about all of the problems she'd  had with breaking thread and wacky tension as she quilted it. Then she said that she wouldn't be sad if she never had to do another t-shirt quilt. My youngest son was already in college by then and already had the t-shirts stacking up (my sons were joiners). At that moment I figured I just needed to learn to do it myself, and that very month I was attending my first machine quilting classes (where I was, in all honesty, the class dunce).

One other near completion, my "Mom's Flower Garden" quilt finally got the border attached. Here it is on the guest room bed, making sure it is the size I want before I send it off to be quilted. Yes, there are too many quilts in the queue, so I am quilting this one by check.
Every couple of years I hire a friend that does excellent work and let her finish one of for me, and this is one of those times. I am excited to have her work her magic and get this 22 year old UFO into the "finished" pile!

And lest you think you are on the wrong blog, I do have a couple of small quilts that are in the works. One of them should end up being my mini of the month and will make an appearance here soon.

Our little valley has had an explosion of Covid cases in the past couple of weeks. We went from under 100 to over 700--heavily related to employees at a meat packing plant. Hope you are all able to stay safe, wash your hands, social distance, and wear a mask when you can't.

Until next time,
Janet O.


Saturday, May 23, 2020

May Monthly Mini and Moonrise for Maggie

Don't anyone fall over in shock that I am posting my monthly mini a whole week before the month ends. It is highly out of character for me, I know. I will link with Wendy at The Constant Quilter blog for our monthly mini at the end of the month
This is from the Pam Buda pattern Cinnamon Sticks from her Tokens of the Past "Spice Box" collection. I actually bought this in kit form--rare for me. The cool pincushion with it is from a swap I had with Julie last August. You can see in the pattern below that this mini has a border, but when I got mine to that point it just felt finished.
The batting was very flat cotton, so it was hard to get a good photo of the quilting design I used, but I did the best I could to adjust the lighting. Maybe you can tell what I quilted.
The official name of this pattern may be Cinnamon Sticks, but I have named mine Chocolate Covered Cinnamon Bears. That is how I prefer my cinnamon. :)

I do love red/brown quilts, and have made a few small ones. Okay, so the little one in the clip has a bit of pink in it, too, but overall it is red/brown.

Maggie's quilt got bound, washed, labeled and shipped. I am happy to report that the bleeding from the thread and the panda bears on the backing (bleeding panda bears--that doesn't sound good) was all taken care of when I washed it in blue Dawn and threw in three Color Catchers. The Color Catchers came out more grey than orange, but you could tell there was an underlying orange tinge to them.

Thank you to Debbie for the name  suggestion "Moonrise for Maggie." I loved that, and it went on the label, along with the acknowledgement that the quilt was made from Bonnie Hunter's Orca Bay pattern.

Since I finish so few large quilts, I had to get a few glamor shots and celebrate the moment.
This was in the yard with some of the lilacs that are currently scenting the air. DH was a good quilt holder, even though the breeze was working against him.

Here is another shot with the lilacs.

And finally inside on my living room quilt rack. It is obviously brighter than what is usually in my home. The other quilts on the rack were made by my Mom.
Thanks for indulging me and my photo shoot. :)

You know, sometimes it is just really hard to give something away. Not because I don't want to give it, but because there is no one to take it. The first numbered comment I drew in my blogiversary giveaway was someone who asked not to be included. The next three were people who were "no reply" comments, and they had not included their email. I want to thank all those of you who DID include your email. Too bad you weren't one of the ones chosen by the random number generator. But FINALLY Barbara Black came up as the winner and she has been notified, and her prize will be in the mail soon.

Thanks for all your lovely comments. They brighten my day. It is fun to hear from so many of you.

Until next time,
Janet O.


Saturday, May 16, 2020

Maggie's quilt and a blogiversary

Maggie is my youngest granddaughter. She just turned 5 and I haven't made a quilt for her since her two crib quilts. It was time. I gave my daughter the choice of a few finished tops I have on hand and she chose my version of Bonnie Hunter's Orca Bay.  If you are familiar with this pattern you may recognize that I cheated and used stripes and plaids in place of the string pieced blocks. This is the quilt that made my mother exclaim, "I could never get to sleep under that quilt!" 
Here it is with the binding half finished. That's where it stands.
I am the world's slowest binder. I have already spent two very long evenings stitching on this binding. People always tell me I will get faster after doing more. Are they kidding? I bound my first quilt in 4-H about 50 years ago. Believe me, I am not getting faster!

I originally named this Sunset Over the Rockies when I first made it way back when, but since it was made entirely from men's thrift store shirts, I renamed it Sunset Over the Men's Department. That is hardly fitting for a little girl's quilt, so it may get a new name--again. I'm still pondering that.

It has been a very long time since I have finished anything larger than a wall hanging with an all-over design of FMQ. I always worry that I will not be able to keep the size of the design consistent throughout. To choose a design one of my go-to sources is this book of Patsy Thompson designs. It isn't really a book, but I made it into one. She has a slew of wonderful designs for free download on her website here.

Years ago, when I was first getting my feet wet in the free motion quilting sea, I participated in the SewCalGal (now QuiltShopGal) Free Motion Quilt challenge and Patsy Thompson was one of our monthly teachers. I felt like some things (feathers, for one) really clicked for me while following her tutorials, so I looked at what else she had to offer on her website and was excited to find her free designs. As I began downloading the pages, I knew I needed to organize them somehow. I created a cover to make sure she got the credit for everything and I had it printed on cardstock and laminated. Then I placed all of the designs between the covers and had the whole thing spiral bound. It is very convenient and helpful to flip through and find a design I want to try.
My attempts never turn out exactly the way hers do, and that's okay. She plants the seed of the idea with her design and as I try to replicate it a new version appears. On my practice piece I realized I was starting the design too small and it would take forever, use more thread, and make a stiffer quilt, so you can see that I shifted to a larger scale.

And speaking of the thread, I chose a salmony orange from Mettler. I prefer Aurifil for less lint and a finer thread, but they didn't have a color anywhere close.
The Mettler color was only available in the smaller spools. I had one and I bought the last four my quilt shop had. It is only a twin size quilt, so I hoped that would be enough. But it wasn't. I had about half of the last border left to quilt when I was totally out of thread. Knowing I would find no more in town, I decided I would just make do. I reached for a spool of orange Aurifil--so much brighter than what I had been using. I picked up the bobbin that was stored with it, but when I saw it in brighter light it wasn't the same color on the bobbin. It was the original Mettler thread I had been using and it was about half full. WooHoo!! The bobbin doesn't fit on the spool pin of my machine, so I hand wound it onto the spool I had just emptied. As I continued quilting the rest of the border I practically held my breath the whole way. I made it, but just barely.

This was quilted on Gidget, my HQ Sweet Sixteen. (Can you see the panda bear fabric I used for backing?) It is the largest thing I have quilted on it since my shoulder surgery two years ago and I could tell my left shoulder tired much more quickly than my right. I need to build up those quilting muscles. There are many larger quilt tops hiding in the closet. :)
I know I have touted the excellence of the Quilter's Select rulers before, but I have to put in another plug. Before stores closed down, I had purchased this ruler, which is for machine quilting. It is thicker than the rulers for rotary cutting, and it has finger holes. The coating on the back made this stay in place for straight line quilting better than ANY OTHER METHOD I have tried--and I have tried them all, from medical tape to sandpaper dots, and everything in between.  Believe me, this is worth it!
I used a stencil and a water erase marker to mark the design in the outer border. After it was quilted, I sprayed it with water to remove the marks. As I placed the quilt in my lap to start binding, I saw something I have never seen before. Not only had the panda fabric on the back done a little bleeding, but the thread had been bleeding, too. Have you ever had that happen?? When I finish the binding I will wash it with some color catchers and see if that helps, but this took me completely by surprise! At least it doesn't show on the front.

Wow, I really detailed you to death on this post, so if you stayed with me, here is the fun part. Today, May 16th, is the actual 9th anniversary of my blog. I have a little thank you giveaway for my loyal readers and friends.  
There is an autographed copy of Pam Buda's new book--Vintage Treasures, a little bowl filler I made from a leftover block when I made a log cabin doll quilt, a Moda design magnetic closure notepad, and one of my new favorite scented candles. They are made from palm wax, cotton wick, and essential oils. They are great and I want to share them.

Leave a comment if you are interested. If you have  commented before and never received a reply from me (I reply to everyone that has an email attached to their account), PLEASE leave your email address in your comment or I have to choose a new name.
On that note, happy blogiversary to me! :)

Drawing now closed!  

Until next time, 
Janet O.


Friday, May 1, 2020

April Monthly Mini

Didn't think I would get one made for April, but here it is, and it all happened on the last day of the month! I'm linking here with Wendy (The Constant Quilter blog) for our monthly minis.
Whoever coined the term "soft quilts for hard times" gets credit for this one (ETA--I believe I read it on Barb's blog, as she mentioned in her comment). I was making a mask (what else?) out of batik scraps from previous masks. I was laying out some 1 1/2" squares and realized I was pulling out all of the soft colors from the leftovers. I was preparing to make rows in the shape I needed in order to cut out the mask shape.

I had so many squares in these soft colors, and that is when it hit me to make a "soft quilt for hard times."
I set the mask making aside and started laying out the squares for a little quilt, using leftovers from the filter pockets in the masks to create the alternate squares. I quickly sewed the rows together, layered it with batting and backing, and drew some feather spines across the surface. You can barely see the lines in the photo above.

Then Gidget and I went to work, and this was the results. It makes me think of the Emily Dickinson poem, "Hope is the thing with feathers." So this little quilt in soft colors, made from remnants of mask making for Covid-19, and quilted with flowing feathers, will symbolize hope to me--hope for times when we can gather with family and friends without fear of infecting someone with a deadly virus. 
I will get the mask that inspired this little quilt made soon--all the parts are ready.


I had already made over 100 cotton masks when my brother challenged me to make a mask for a quilter. This soft colored one-patch is one of three that I am making to meet his challenge.
The one not pictured is strip-pieced in sunset colors. 
 

 And the first one was made from little thimbles (or tumblers). Can you tell I am smiling? I always find it funny when I am wearing my mask in a store and I smile at someone, then realize they have no idea I am smiling at them. Such is the world in which we now find ourselves.

Finally finished the runner for my brother's dining room table.
I used a stencil to mark the quilting on the blocks, but it wasn't enough. With the densely quilted feathers in the setting triangles, the blocks were poofing up (technical term). I had to go back to the blocks and add a couple more rows of quilting.

After more than two weeks since my last post you would think I could come up with more than this--but I can't, so there you have it. Going to work next on quilting a bed size quilt. Won't that be shocking!

Until next time,
Janet O.

Tuesday, April 7, 2020

Much sewing, minimal quilting

Last August I decided I would make a table runner for my brother's dining room table. He has one old one Mom made decades ago as a "dresser scarf" for her bedroom, but it doesn't match the colors or decor of his dining room, and is quite worn. I heard him talking to my younger sister about wanting to get one that would fit in better. He has a quilt Mom made hanging on the dining room wall and wanted to pick up the colors from it. 
Mom's quilt hanging at my brother's. This is Pioneer Sampler designed by Eleanor Burns.
My sister was talking as though she would do it for him, but she has done very little quilting, and has very little spare time. Later I told her not to worry about it and I would do it. She was relieved. Within a couple of weeks I had pulled fabrics that matched the colors of Mom's quilt and had made a stack of 9-patch blocks, not sure where I would go from there. And then they sat. Last month was his birthday, so I took the blocks to his home and told him what I was trying to do and he gave me some input. I promised him it was my quilting priority. This is the results so far.
Poor lighting in this photo. Since this was taken I have marked it, basted it and completed the ditch-stitching. I tried to start free motion quilting Monday, but Gidget (my HQ Sweet Sixteen) was having tension issues. By the time I straightened it out the good late afternoon light that streams in my sewing room window was gone. I'm hoping to have some time to work on it Wednesday.

I had said I wasn't going to make face masks.The hospitals here won't take them, and there is so much contradictory info as to which pattern is best or whether any of them are effective. It made my head swim. But I wanted to do some sort of "helpful sewing", so I answered Lori's call for "pillowcase dresses" for little girls for her future mission trip.
Check out the link above if you want to join in. I used the first pattern option on the Nancy's Notions link she has listed, and they go together easily. These use the same elastic that are needed for the masks, so if you don't already have some on hand, you may have a hard time finding it. Luckily I already had a large pack.

Then ED shared a pattern for face masks that was requested by a health organization in her area. So I changed my mind, made a baker's dozen and sent them her way.
And now that it is recommended we all wear a mask when shopping, etc., I decided to try a different pattern. Trying to tie a mask behind my head just seemed to invite my hair to get tangle in the ties, and I could see it would be too frustrating. 

So I looked around the web a bit and found I liked this pattern from Lorrie Nunemaker. I decided to try making it with elastic loops instead of ties. I used batiks for the outside of almost all of them and lined them with T-shirt fabric. The pattern includes a pocket for more filter material, if desired. I included it on some of them, but not all. The tightly woven batik and  T-shirt material (which is recommended as one of the best options for filtering capability) combined make a pretty good DIY mask, I believe.
There is an adult-size template and a child-size one. The "Frozen" and "Cat in the Hat" masks were made with my youngest two grandchildren in mind. These were all made for my family and whatever they don't want I will find somewhere to donate. They make up quickly and there are no long ties to sew up (thank goodness). I understand that healthcare workers who have to wear these all day say the elastic can bother their ears after a while. But these are just for quick trips to the store, etc. And they used up the last of that big package of elastic.

One more brief quilty note--hopefully soon this border will be pieced and sewn onto the Flower Garden quilt. The center is all assembled. I get almost giddy when I see this top so near completion after 22 years!! I am so glad I didn't give up on this.

One last thing, it is Springtime in the Rockies again. If you have followed me for a while you may recall that this is when the resident llama on the family farm takes on "babysitting" duty. It sits, and baby lambs climb on. So fun to watch from my sewing room window!


Thanks to all who participated in my National Quilting Day party favor drawing. Names were drawn and notified March 30th. Prizes were sent the next day. I have heard from a few that they have been received and I am guessing that by now all but the two international winners would have theirs. If you are in the states and you have not received the party favor you won, please let me know.

Oh, such a long post. If I would make time to post more often this wouldn't happen. Honestly, just because we can't socialize doesn't seem to have made life less busy. Why is that, I wonder?

Until next time, as our current state campaign reminds us, "Stay safe: Stay home."
Janet O.


Saturday, March 21, 2020

March Monthly Mini, Mom's Flower Garden, and a little fun for National Quilting Day

I know I haven't been spotted much in blogland this month, so I thought I should make up for it by posting my Monthly Mini earlier than usual--much earlier.

This is the Kim Diehl pattern "Prairie Stars". You may or may not recall that I purchased the kit a couple of years ago, only to get it home and discover it was applique--which, for the most part,  I don't do. But I figured out a way to make it with foundation piecing. I started making the blocks at my usual January Winter Retreat in 2019 and I finished making them and sewing the rows together at Winter Retreat this year. Finally quilted it Thursday and bound it on Friday. There are so many places where the points don't match up, and I don't care. I like it and am glad to have it finished. I'm linking with Wendy at The Constant Quilter blog for our monthly minis. Go see the links to all the other wonderful minis.


This blurry photo gives you an idea as to how I quilted it. As with so many of my mini quilts, I did SITD for the blocks, and free motion in the border. 


And this photo gives you a size perspective. It finished at about 10 1/2" square.


It feels SO good to have made so much progress on my "Mom's Flower Garden" quilt. It was just last June when I decided to take my multi-sized hexagon flowers made over the past 22 years (you can read about this saga here if you are new to this blog) and applique them to a muslin background. Having already mentioned above that I don't applique, you know this was a difficult decision. I thought it would take me forever. But it has been my take-along project whenever I have spent time with Mom, and on a couple of short road trips. Two weeks ago I was at this point. Everything was sewn together except for the bottom row and sashing.
I had mentioned that I was going against the grain (for me) with this quilt and sewing the rows as I went along, which I never do. It has come back to haunt me, as I see some blocks of the same color too close together, but I am letting it be. The blank spot in the bottom right corner was the block I was working on at the time the photo was taken, and the baggie hanging in the space beside it was the one block I had not already assembled. If you know how I feel about EPP, you will know I was not eager to make even 1 more flower! But I did it. I still need to applique it to the background, but for now, this is where this project stands.
Once that pink flower on the bottom row is appliqued I will assemble that row and get it attached. There will be one outer border to add and then this will probably have to marinate in the closet for a time while I decide how I want to quilt it.

My focus this year is really on my UFOs, but with all this "self-isolating", I had to try something fresh and different. I pulled out a Pam Buda kit for a mini that I had purchased last year and decided to give it a go.
I got it cut out earlier this week and have just worked on it here and there between other projects. I love red/brown quilts. This is the one on the bottom of the pattern cover. It is called Cinnamon Sticks and it finishes at 12x15 inches. So cute!


Okay, now for the National Quilting Day celebration. I would invite you all over for a party, but since there are more than 10 of you, that would be frowned upon. So I am offering some "Quilting Day" party favors. Some of these items were purchased specifically for this giveaway and others came from a feeble attempt to clean my sewing room.
One per person, names to be drawn before the end of March.
First up are some Kim Diehl "Simple Whatnot" patterns.

1. Prairie Stars--the pattern I used for my Monthly Mini featured above. Remember, it is applique. :)


2.  Honeycomb--much to my surprise, when I opened this pattern the other day I discovered that it is applique, too. Not going to mess with this one myself.


 3. Frugal Farm Wife


4. Next up is this great Judie Rothermel pencil conversation print. I have 4 FQs of it, so 4 of you could be receiving one of these.


5. Then we have a wool applique pattern from Primitive Gatherings


6. Next is a Jen Kingwell Postcard Project #4. When I bought mine, I also bought a set to give away. You can read about my experience with this pattern here. I struggled with some aspects of the templates because it is intended for hand piecing, which I didn't want to do. But I sure liked the finished quilt.


7. Finally we have a mini Tumbler Template with a couple of Jo Morton mini charm packs. The template is just the right size for the mini charms. Works like a charm. (Sorry about that.)
There you have it--10 chances to receive a National Quilting Day party favor. With all of this craziness going on, wouldn't it be great to get some fun mail? So if anything appeals to you, just note the numbered items that caught your eye in the comment section. You will only be selected once, but you can increase your odds by choosing multiple favor possibilities. Let's Party!!

Drawing is now closed as of March 30th

Janet O.

ETA: This is how I honored National Quilting Day.