Tuesday, February 28, 2017

Coming to the end of the line.

In mid-January I decided to see what was left of my little flimsies. I have made major progress on these little quilts starting about Fall of 2015. Then I made 2016 the year of finishing the minis, and a whole lot more were completed. So this was all that awaited stitching from my mini pile (we aren't talking about the big quilts hanging around the house somewhere--just step away from the closet).

You have already seen three of these finished up in the past couple of months.

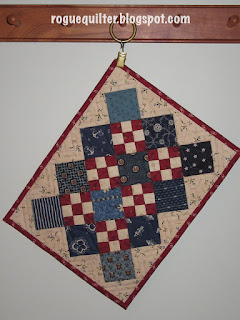
Here is a fourth.


Quilting was kept very simple and very free hand, except for the wavy line around the outer border. I did mark that.


Now I have two more basted and ready to go. The Buttermilk Basin pumpkin banner is leftover from a batch of basting last year. I just noticed that all three of these involve wool applique, and they represent 3 of my favorite designers--Kim Diehl, Lisa Bongean, and Stacy West.

The top quilt will be a mix of hand and machine quilting. I have made this before and I completely hand quilted the first one. Don't feel a need to do it to this one. I will machine quilt the other two.


And I also finished off the little Buttermilk Basin Noel pillow from a kit I picked up at the workshop with Miss Stacy last year.
You can see it there at the bottom of my little sewing room tree, which proudly displays ornaments all year, made by friends and family (including me).


So these are what I still need to get basted and ready to quilt. Once I get to that stage, they usually move along pretty well (with the exception of the pumpkin banner seen above).   

One of these days I have to gather my courage and actually decide how to finish those two bitty ones at the bottom.


Julierose, you will be receiving the Primitive Gatherings "Be the Good" pattern from my last post. Please send me your snail mail so I can get it on its way.

Until next time,
Janet O.

I wanted to share last night's reflection of the sunset in the West onto the snowy mountains in the East. Wish I had been able  to avoid the telephone lines in the photo. This was taken from my kitchen window, and by the time I could have run downstairs, outside, and down the road to see past the tree on the right, the moment of wonder would have passed.
 

Friday, February 24, 2017

Small stuff keeps happening

I gathered my courage this week and quilted my version of Primitive Gatherings Pinwheel Garden.
Of course, I made my units smaller than the pattern called for, and I made mine square. 

It has been awaiting quilting for some time, but I couldn't make up my mind.


Linda Hrcka posted one on
Facebook a while back that she had quilted in an all-over pattern. I really liked it, but couldn't bring myself to do it here. Since my units are smaller, I was concerned that the all-over quilting pattern on such small units would overpower the piecing. I ended up doing mostly SITD and some curves.


I can't recall now what made me choose to do it in scrappy browns, and blues. The photo on the pattern shows a beautiful, totally scrappy little quilt, but I think I may have had some blue/brown HSTs leftover from something else, and I liked the combo. So there you have it!


I will continue to work on quilting up the small quilts, until I can get "the beast" basted. My shoulder is not looking forward to that quilting job!

This is what is under my needle now. It is shown here getting some SITD.

Some happy mail arrived recently. Kevin, the quilter, shared some lovely repro scraps with me, and it appeared the be the perfect bundle for making something I have long wished to make. Lisa Bongean's "Tiny Tears" is a very scrappy little thing, and I think this bundle will be great for this scrappy look.                                                      
Lisa designed this little quilt after she lost her son a few years ago. I thought it would be an appropriate quilt to make with these scraps, which were sent to me soon after the passing of my Father. Thank you, Kevin!
Betsy's fabric bundle

So maybe I have caved in for a SAL this year. I went ALL last year only doing Lori's doll quilt SAL, as had been my plan (and continued to be my plan this year). But the Moda Blockheads SAL called to me and I even ordered a bundle of Betsy Chutchian's fabrics. I have plenty of Jo Morton's and Lisa Bongean's lines. I was going to order Jan Patek's bundle, too, but I stopped the insanity at that point and figured I could get by with what I had.
I won't be making any applique blocks that may be a part of the SAL, and if I don't love a block, I won't make it. Very likely I will fall behind, but I am hoping I won't get discouraged and give up, like I usually do. A block a week may not seem like much, but it is often a block more than I accomplish in a given week. I'm hoping I don't regret this. : )
 

Found a duplicate pattern as I am slowly sorting through things in my sewing room. If you are interested in this, please say so in your comment and I will draw a name to receive it.

Thought I was going to keep this short. Didn't happen.

Until next time,
Janet O.


Friday, February 17, 2017

Little Finishes and Big Plans

The love birds were finally able to settle into their new spot--at least for the rest of February.
(Maybe I should have pressed it so the edges wouldn't appear so wavy. They really are straight.) I did NOT have this done in time for Valentine's Day. The last two sides of the binding were stitched down the day after. Close enough.

This was mostly hand quilted. I machine stitched around the block and the HST border. I would never want to hand quilt through all the bumps of those seams! This little jewel was appliqued by Karen (logcabinquilter blog), and it finished at 9".
Haven't named it yet, but the label is in place, just waiting for words.


As is the label on this one.
This top was whipped up about a month ago when I needed fabric therapy, and was quilted entirely with the walking foot. 
It finished at 7 1/2" x 9 1/2".


It can't decide where it wants to live for now. But come June it will come out and play with all of the other r/w/b quilts.


One more little finish. Had some of Pam Buda's Old Plum Calico line laying out in the sewing room and after making the ornaments from Dad's shirts I had to try one in these lovely colors. On a whim, I made the border a little wider than usual. I'm not sure I like the "larger" size.


As for my big plans, I purchased the backing and batting for "the beast" yesterday. I use low loft poly batting in T-shirt quilts--gives a little fluff without adding weight to the already heavy top. Now I need to baste the thing!!

So what is on the design wall now? More of Mom's scraps! I do not usually work with florals, so this is a stretch for me (help me, Debbie).

These 12" 64-patch blocks are made from scraps from a few of Mom's quilts. I started with leftovers from her watercolor quilt, but ended up having to dig into scraps from a Dresden Plate quilt and a postage stamp style (though not using 1" squares). I'm thinking about narrow sashing--possibly black? But I can't decide on setting triangles. I don't own any floral pieces large enough to fill in those spaces. I just hope this doesn't occupy the wall for a year before I can decide what to do with it!

So little happening in the sewing room, and I don't see that changing any time soon. 

Until next time,
Janet O.

Saturday, February 11, 2017

A Few Finishes and a Work In Progress

Finally got the binding on Quilters Madder. Love this SAL quilt from Lori at Humble Quilts blog.

Mine finished at 17 1/2" x 14 1/2".

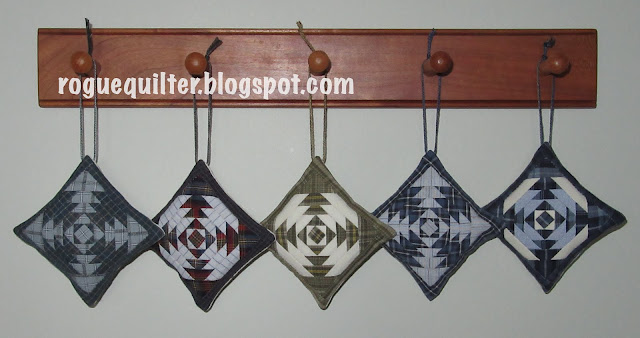
Mom's birthday gift of ornaments made from Dad's shirts were completed and delivered this week.

She was thrilled with them. As usual, they finished at 2 1/2".

When I received a pincushion from Randy at Barristers Block blog back in October she had wrapped it in 5 strips of fabric.  
I immediately sewed 2 of the strips together and used them to make 4-patches as leader/enders. I knew I wanted to use the 4-patches for a little Valentine quilt, so when I needed a quick project this week for therapy, I grabbed the 4-patches and this quilt was born. I think I may call it "Sprinkled with Love." Inspired by the recent Temecula "Box of Chocolates". Finished at 7"x 9".


Progress on the little lovebird block by Karen at Log Cabin Quilter blog. I machine quilted around the block and then around the HST border.


Now I am working on hand quilting around the applique, and a cross-hatch pattern on the background.
 
Don't know that these little lovebirds will be ready for Valentine's Day, but it will be close. I need to set them aside for now and focus on polishing up my Sunday School lesson. : )

Our little farming community has been ravaged by severe winds and flooding this week. Prayers are with all my neighbors that are trying to stay above water, and pick up the pieces from the wind damage!

Until next time,
Janet O.


Saturday, February 4, 2017

Feelin' the Love

It is in the air, and in the sewing room.
Made TWO of Temecula's little Box of Chocolates quilt. I haven't made anything from Temecula's blog for a long time, because I have a tendency to have to make multiples--up to four of one pattern! So I have avoided them for years, but I couldn't avoid this one.
The binding on the bottom one is just pinned on, so it is wavy.
Most all of the fabrics in these little quilts were given to me by a dear friend that has since passed away. I am going to send one of them to her husband as a little Valentine from her.

I am also feeling the love with these two little lovebirds. This was one of three applique blocks sent my way from Karen (logcabinquilter blog). I had plans for bordering and quilting all three, to make little seasonal quilts--one for Christmas, one for January, and this one for February, but with Dad's passing, the others haven't been touched.
Papers are still on the back of the borders, so it is not laying flat.
The pattern was from a BOM set by Bunny Hill called "A Tisket A Tasket"
This will probably be finished with a mix of hand and machine quilting. If I can get that done and then find anything that matches the shade of the light pink heart, I may have it bound by Valentine's Day. I have more to say on this one in a minute.

Finally, I am feeling Dad's love as I use his plaid shirts to make these little ornaments for my Mom's birthday gift. I had them to this stage for her birthday, but they still need stuffing.

I will also be making her a simple memory quilt from the shirts, but I wanted to have these to give her on her birthday. I will make a couple of ornaments for each of my siblings as their birthdays come along, too. If you can't tell, Dad gravitated to blue plaid shirts. These are only a few of the many, but I tried to use the smallest plaids in these. The ornaments finish at 2 1/2".

Okay, back to the lovebirds. I've seen some bloggers' frustration lately trying to make small HST borders on little quilts come out the correct size. When I use little HSTs (1/2"-1/4") like these to border a quilt I find that piecing individual HSTs and then sewing them together into a strip is often going to give you an inaccurate length border, unless you are insanely precise in your 1/4" seam (and if you are, may I please have your autograph?). When working this small, every thread you may be off is crucial to the finished product.
Even foundation piecing may not be enough if you use any of the methods that have you creating the HSTs in a grid and then cutting them apart, pressing open, trimming, and sewing them back together in a strip, such as Triangulations, shown to the right  (which, BTW, I love for other projects where I just need a bunch of HSTs to sew into blocks, and NOT into a long strip).

It really isn't wonky. It is just how it is hanging.
I used this method when I made my version of Lisa Bongean's Little Buds, and I ended up with one more HST on the top border than on the bottom. These HSTs finish at 1/2".

                       My first introduction to my preferred method was when I made this little feathered star.
The foundation pieced pattern used a long strip of HSTs, kind of "piece-as-you-go". I can't find the pattern right now, but it was something like the ones shown below. They finish at 1/4"

   You piece the HSTs in a strip, so the size is  assured.


Front, before trimming


Back, before trimming
On the photo of the back of the strip you can see the dotted lines marked 1/4" from the finished size. Those are the trimming lines.


When I need a length or size that I can't find in a pattern, I grab a ruler, fine point marker and graph paper and create my own. Then I photocopy it onto newsprint, which tears away easily when foundation piecing. 
Hope this may be helpful to someone.


Until Next time,
Janet O.